Fan Drive Replacement: What to Expect and How to Prepare
Replacing a fan drive is a critical maintenance task that ensures your engine cooling system operates efficiently, preventing overheating and potential engine damage. Whether you’re dealing with a worn-out component or upgrading to a more advanced system, understanding the process and preparation steps can make the job smoother and more cost-effective.
STep 1: Identify the Correct Fan Drive Replacement
Before initiating any replacement, it’s essential to identify the exact model of your current fan drive. Horton fan drives typically have part numbers pin-stamped on the front of the drive, often near the fan pilot or about halfway between the center and the outer edge of the fan mounting surface. Additionally, part numbers and serial numbers are printed on an adhered tag. Once identified, you can search for the appropriate replacement using Horton’s online catalog or consult with a dealer.
Step 2: Choose the Right Replacement Option
Depending on your needs and budget, you have several options:
Direct Replacement: Opting for a direct replacement ensures compatibility and maintains the vehicle’s original performance standards.
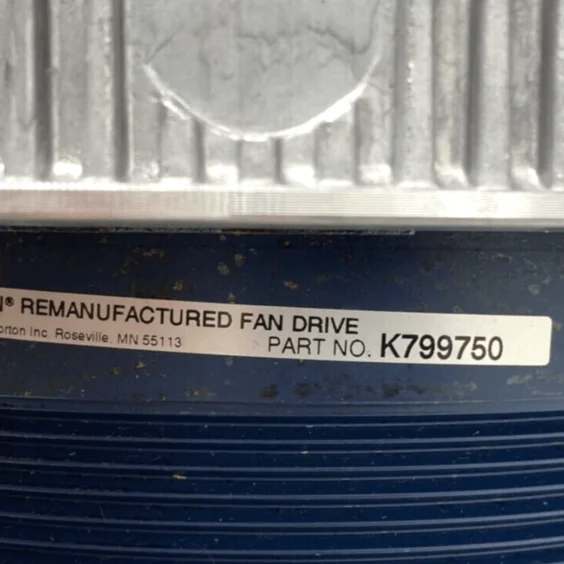
Remanufactured Fan Drive: A cost-effective alternative, remanufactured drives are restored to OEM specifications and often come with a warranty.
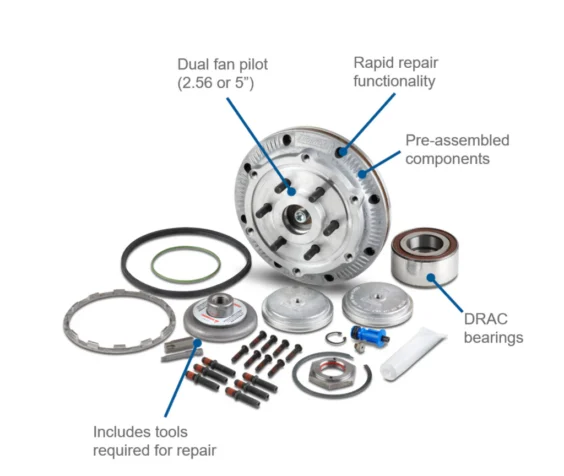
Repair Kits: For minor issues, repair kits can be used to replace specific components like seals or friction discs. However, they may require more time and expertise to install.
Step 3: Gather Necessary Tools and Equipment
Before beginning a fan drive replacement, it’s critical to gather all the necessary tools and equipment to ensure a safe, smooth, and efficient process. Here’s a breakdown of the key items you’ll need and why they matter:
Torque Wrench: Precision matters. A torque wrench is essential to apply the manufacturer-specified torque to bolts and fasteners. Over- or under-tightening can lead to damage or future failures, so following torque specs is key for long-term performance and safety.
Socket and Ratchet Set: A reliable socket and ratchet set allows you to remove and install bolts of various sizes. For tight spaces around the fan drive and mounting components, having deep sockets and swivel adapters can also be incredibly helpful.
This step-by-step video covers best practices, required tools, and key safety tips to ensure a successful replacement.
Pry Bar: Some fan drives may be tightly fitted or stuck due to corrosion or prolonged use. A pry bar helps you gently but effectively loosen components without damaging surrounding parts. Use with care to avoid stressing mounts or housing.
Sealant and Lubricants: Use approved sealants where specified in the service manual—typically for gaskets or threaded fittings. Lubricants such as anti-seize or bearing grease help protect new components and ease future servicing.
Safety Gear (Gloves, Googles): Protect yourself while working. Gloves guard against sharp edges and hot surfaces, while safety goggles shield your eyes from debris, fluids, or accidental part movement. Safety should never be an afterthought.
Service Manual for Your Specific Vehicle Model: Always refer to the official service manual for your vehicle or equipment. It provides torque specs, step-by-step procedures, and component diagrams tailored to your exact make and model—critical for a correct and efficient install.
Step 4: Remove the Old Fan Drive
Disconnect The Battery: Safety first—disconnect the negative terminal to prevent any electrical accidents.
Remove The Fan Shroud: Carefully detach the fan and any surrounding components to access the fan drive.
Unbolt The Fan Drive: Use the appropriate tools to remove the bolts securing the fan drive to the engine.
Inspect For Damage: Check for any signs of wear or damage to surrounding components that may need attention.
Step 5: Install the NEw Fan DrivE
Position the New Fan Drive: Align the new fan drive with the mounting points on the engine.
Secure the Fan Drive: Bolt the fan drive into place, ensuring all fasteners are tightened to the manufacturer’s specifications.
Reinstall the Fan and Shroud: Reattach the fan and any other components removed during the disassembly.
Reconnect the Battery: Reconnect the negative terminal of the battery.
Test the System: Start the engine and monitor the cooling system for proper operation.
Step 6: Post-Installation COnsiderations
System Sentry® Feature: If your fan drive is equipped with Horton’s patented System Sentry®, ensure it’s functioning correctly. This feature reacts to heat buildup caused by fan drive slippage or obstructions, disengaging the fan drive before extensive damage occurs.
Regular Maintenance: Schedule regular inspections and maintenance to prolong the life of your new fan drive.
Training Resources: Consider utilizing Horton’s free training program to familiarize yourself with fan drive operation, maintenance, and troubleshooting. This program includes online modules and printed manuals, and successful completion provides certification
Expert How-To Videos for Smarter Maintenance
Explore step-by-step training from Horton pros to keep your equipment running at its best.